Thank you for following our tutorials and always
remember to leave your comment after the series, if you have not configured
your JDK visit http://mixtratechnologies.blogspot.com/2015/01/setting-up-windows-machine-jdk.html
We will be concentrating on creating the first
android tutorial for dummies.
Click file and create a new android project as shown below
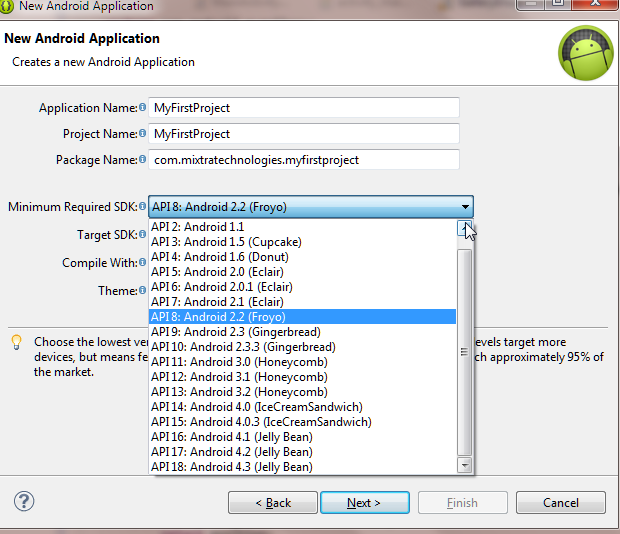
Fill in the Application Name, Project Name, Package
Name and select the Minimum Required SDK and the Target SDK by choosing in the dropdown list as shown
below
Fill in the fields as shown on the screen shot
above.
Click on Next
button, and now the other important setting we need to set
up before we can launch our project is setting up the launcher icon but normally
if you will not set up the launcher icon the default android icon will always
occur, but now I want us to set on our own icon rather than the default icon.
See the screenshot below
Navigate through the foreground buttons which are
Image, Clipart and Text. For our case we will be using Text and we set our Text to hello. We can change
the font, crop the image, add shape to our text and change the Background and
the Foreground colors depending on your choice.
Click Next and create the MainActivity.java
and the activity_main.xml as
shown in the screen shot below.
The MainActivity
represents the Activity Name and activity_main represents the Layout Name. Now
click finish.
This is how the android project would be like so
that you cannot have some difficult time
tracing the folders. The MainActivity is in the src folder and the activity_main
is in the Layout folder, as shown below
On your IDE menu click project, then clean the project after that you are good to run your first android program
Leave your comment as always .


No comments:
Post a Comment